About Wall Decor's Decorating Tips & Tricks
You've selected your paint, roller and brush and are prepared to start painting. Properly loading a brush or roller is extremely important in achieving the best results and is one of the simplest steps, however often times the most overlooked. Lets review proper loading techniques for both brushes and rollers.
Loading a Paint Brush
- Never dip your brush directly into the paint can to load it. This will eliminate any loose bristles or dirt elements from mixing with the new paint in the can.
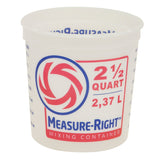 Purchase a small a paint pail available at most hardware stores for less than $3 and fill it approximately half way with your paint.
 - You will also want to have a piece of cardboard, approximately 12"x12" to use in this step. Now dip your bush into the paint in the pail about half way up the bristles. Lightly tap the end of both sides once or twice onto the inside wall of the paint pail to remove excess paint. NOTE: DO NOT scrape the brush across the top edge of the pail to remove paint as this defeats loading the brush.
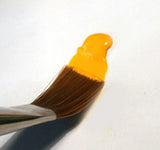
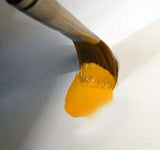
- Take the loaded brush and gently place the tip of it in the middle of the cardboard. Push downward slightly - just enough to bend the bristles - then pull the paint to the edge of the cardboard. Once at the edge reverse the motion and pull paint to the other side of the cardboard - the same motion used to load an artists paintbrush.
 Purchase a small a paint pail available at most hardware stores for less than $3 and fill it approximately half way with your paint.

Loading a Paint Roller
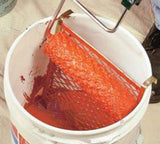
- Our recommendation to start - do not use a regular paint tray. They are inefficient and as paint builds up and dries you will be loading dried up pieces of paint onto your roller. Purchase a simple plastic 5 gallon bucket and a bucket screen.
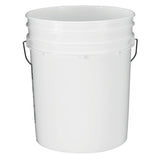
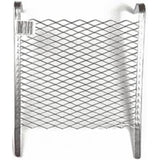
- Fill the bucket with approximately 3/4 of the gallon of paint the insert the bucket screen, ensuring the hooks hang over the side of the bucket so it does not fall into the bucket.
- Prior to loading the roller take some painters tape and use the adhesive side on the roller cover to remove any loosed fibers.
- Install the roller onto the frame.
- Dip the roller into the paint, however only enough to coat the fibers, but try not to get any paint onto the ends of the roller frame.
- Take the roller and begin to roll on the bucket screen to load the roller cover.


When deciding to paint a room the ceiling should always be the first area you paint. Once you have wiped down your ceiling for painting and taped the area you are ready to begin.
- Only work in sections large enough so paint remains wet during coverage. It is recommended to work with areas no larger than 2' x 4'.
- First, utilize a chisel trim brush to cut in the paint in at the ceiling edge where the walls meet and around any fixtures. Pull the paint from any of these edges out onto the ceiling about 3"-4", enough to roll over in the next steps.
- Once you have loaded your roller, see Loading Your Roller or Brush, prior to applying paint to the ceiling.
- One item to keep in mind is to never apply heavy pressure on the roller when painting. If you purchased a high quality roller cover and have loaded it properly the roller and paint will do all of the work. Simply apply a moderate amount of pressure to ensure the paint will transfer from the roller to the wall surface. By limiting the amount of pressure you will also eliminate paint lines formed by the edge of the roller.
- Never start painting close to any of the walls as there will be too much paint on the roller to smooth out properly. Begin about 2' from the wall and begin making a "W" with the roller moving toward the wall and overlap the paint you pulled from edging. Once you have completed the W continue to fill in the remaining parts of the "W". If you loaded your roller properly there should be enough paint on the roller to completely cover this 2x4 area.
- Reload your roller and move to the next section either beside or under the currently painted one. Always paint my moving from 2' out from the last painted area and into the currently painted area to ensure you are blending or overlapping new wet paint into the last wet area painted. Just be sure to always paint in the same direction and never make cross strokes and to always keep a wet edge the entire time.
- Once the areas are joined lightly roll the entire area to blend it together.
- Continue with the method until completed.
- Allow the ceiling to dry a minimum of two hours prior to attempting to paint the walls.
Ceilings, walls then trim. This is always the order to paint a room. This article is dedicated to walls so we will assume you have already painted your ceiling following the steps in our section entitled How to Paint a Ceiling.
Once you have prepared the wall for painting and taped the area off the first step will be to install a primer on your walls. Be sure to select a primer that is appropriate for the type of paint you are applying. NOTE: It is extremely important you do not skip this step as the majority of homeowners do. A foundation of primer will not only assist in hiding the old paint color, but provides the new paint with a surface to grab onto. The following steps are to be followed for both the primer and paint coats:
- Only work in sections large enough so paint remains wet during coverage. It is recommended to work with areas no larger than 2' wide by about 4' high.
- First, utilize a chisel trim brush to cut in the primer or paint at the ceiling edge where the walls meet and around any trim. Pull the paint from any of these edges out onto the wall about 3"-4", enough to roll over in the next steps.
- Once you have loaded your roller, see Loading Your Roller or Brush, prior to applying paint to the wall.
- One item to keep in mind is to never apply heavy pressure on the roller when painting. If you purchased a high quality roller cover and have loaded it properly the roller and paint will do all of the work. Simply apply a moderate amount of pressure to ensure the paint will transfer from the roller to the wall surface. By limiting the amount of pressure you will also eliminate paint lines formed by the edge of the roller.
- Never start painting close to any of the walls or ceilings as there will be too much paint on the roller to smooth out properly. Begin about 2' from the wall and begin making a "W" with the roller moving toward the wall and overlap the paint you pulled from edging. Once you have completed the W continue to fill in the remaining parts of the "W". If you loaded your roller properly there should be enough paint on the roller to completely cover this 2x4 area.

- Reload your roller and move to the next section either beside or under the currently painted one. Always paint my moving from 2' out from the last painted area and into the currently painted area to ensure you are blending or overlapping new wet paint into the last wet area painted.
- Once the areas are joined lightly roll the entire area to blend it together.
- Continue with the method on each wall until completed.

You've invested in an expensive, good quality paint brush and have now completed your job. The next step is to properly clean and store your brush so it will last for years to come. Depending upon the type of paint used follow these steps to clean and maintain you paint brush:
Latex Paint Cleanup
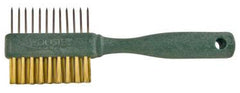
You will need a few items to properly clean your brush. The first will be a clean empty pail or tray and the second is a brush comb or painter's comb (like the one pictured below).
Once completed painting use these steps to clean and maintain your brush:
- Fill you pail or tray about half full with warm, soapy water.
- Dip the brush into the water and work the water and soap through the bristles with your fingers.
- Using a hose or running water from a faucet rinse the soap and paint from the brush.
- If some of the paint has already dried utilize the painter's comb to remove it.
- Continue following steps 2 and three until the water runs clear during rinse.
- You will also need to turn the brush upside down to run water through the bristles at the ferrel until it runs clean.
- Once completely rinsed use the comb to comb the bristles.
- Hang the brush using the hole in the handle to dry.
- Once dried, place the brush back in it;s original cover or holder for storage.
- Always store a paint brush by hanging it. Never store it laying down or on its side.
Oil-Based Paint Cleanup
As with latex based paints above, you will require the same tools then to follow these steps:
- If you used and oil-based paint, varnish or stain you will need to fill the pail or tray with a solvent cleaner such as mineral spirits or paint thinner. If you painted with a shellac you will require a denatured alcohol cleaner. Fill your pail or tray about halfway with the appropriate cleaner.
- Dip the brush into the cleaner and have the bottom of the brush hit against the bottom if your pail/tray, but do not jamb the brush into the base hard as you will curl the bristles. Just ensure it is hitting the bottom enough to assist in removing the paint from the bristles.
- Using a hose or running water from a faucet rinse the soap and paint from the brush.
- If some of the paint has already dried utilize the painter's comb to remove it.
- Continue following steps 2 and three until the water runs clear during rinse.
- You will also need to turn the brush upside down to run water through the bristles at the ferrel until it runs clean.
- Once completely rinsed use the comb to comb the bristles.
- Hang the brush using the hole in the handle to dry.
- Once dried, place the brush back in it;s original cover or holder for storage.
- Always store a paint brush by hanging it. Never store it laying down or on its side.
You have selected your color and prepared the walls for painting, now you need to know which type of brush or roller you require. There are a large number of brushes and rollers available and we explain each of them to you below if you wish to know more, or you can simply scroll to the bottom of the page and use our Quick Select Charts to determine what you need:
Paint Brushes
Many people simply select the most inexpensive brush to paint and then wonder why the paint does not apply correctly, or why the job looks so bad when completed. More expensive brushes hold more paint, the bristles are manufactured of higher quality materials and provide smoother finishes. There are many considerations for selecting a brush, however lets first review the types of brushes available:
Paint Brush Bristle Types
- Natural - Manufactured using animal hair, these brushes are ideally used for oil-based paints, varnishes and stains. There are three main brushes of this type:
- Black China: The most inexpensive and considered to be okay when the finish is not a factor. Can be used for oil-based paint, varnishes and stain.
- White China: Produces a smoother finish than a Black China brush. Can be used for oil-based paint , varnishes, stains, polyurethane, lacquer and shellac.
- Ox Hair Blend: The most expensive, but provides the smoothest finish of all. Can be used for oil-based paint and varnish.
- Synthetic - Manufactured of man-made materials and ideal for all latex based paints. They are very easy to clean and three types are available:
- Polyester: Normally the most inexpensive of the synthetic brushes, however tends to leave brush strokes.
- Nylon/Polyester Blend: A hybrid brush made of both materials. When using this type of brush look at the stiffness. The stiffer the bristles the more polyester, again tending to leave brush marks. The softer the brush the more nylon and thereby leaves a smoother finish.
- Nylon: The most expensive, but considered the best. Will leave a smooth finish on painted surface.
As well as the type of bristles listed above you must also consider the size and brush end types. Lets review the options for each:
Paint Brush Sizes
- 1" up to 2.5": The bristle width of these brushes make them ideal for painting narrow trim and small surfaces.
- 3" up to 6": These brushes hold a large amount of paint and are perfect for painting large areas. Never use a wide brush by turning it sideways to paint small areas or trim - it will damage the brush.
- Angled Brush: Bristles are cut in a fashion to make it easier to apply paint to window trim.
- Square Trim Brush: The ends of the bristles are cut square making it ideal for applying paint to large flat areas.
- Chisel Trim Brush: The square-cut bristles on this brush taper from the ferrel toward the end of the bristles on the brush. This makes it perfect for producing straight lines for trimming in corners and edges.
As you can see there is more to it than just picking up a brush at the local store. To maintain a great finish, and to make the job much easier and faster, take the time to select the correct brush and do not be afraid to pay for a good brush such as Purdy, Shur-Line or Wooster. Also, by taking care of a good, expensive brush, you will be able to use it over and over again while obtaining the same high quality results. Read our article on Proper Care of a Good Paint Brush.
Paint Roller Frames & Covers
This is another area where most consumers simply purchase the most inexpensive roller frames and covers, then again, wonder why the finish of the painted walls only looks marginal. Just as with paint brushes selecting the correct frame and roller cover is extremely important. Lets take some time to review both products to determine which is right for your job:
Roller Frames
Paint roller frames are available in several different materials to include cardboard, plastic or metal. It is safe to state here, and we highly recommend, you stay away from the cardboard frames and invest in the plastic or metal frames. Not only are they stronger, but will last much longer and are easier to clean. These rollers are also available in several different sizes:
- 12"-18": These size frames are normally used by professional painters and are not very common in your local hardware store. They require considerable effort and experience to use.
- 9": This is the most common frame available and is considered the workhorse of the industry. This size is perfect for interior walls and ceilings plus is suitable for most of your exterior house painting needs.
- 6"-7": This is considered a specialty size and works great for smaller areas where the standard 9" frames will not fit.
- 3"-4": This size of frame is intended for painting trim. This frame works great for baseboard, shelves, doors and any other smaller area.
- Mini: These frame rollers are much smaller in diameter - normally 1" or less. They are intended fro areas where standard diameter rollers will not fit such as behind toilets and heat registers. They can also be used to paint shelving and doors.
- Natural - These covers are intended to be used with oil-based paints. Both types will provide about the same results.
- Mohair
- Sheepskin
- Synthetic - These covers are ideal for latex based paints. Nylon covers will provide the best finish, however all three provide very good results.
- Nylon
- Dacron
- Polyester
- Blended - This type of cover combines both natural and synthetic fibers and may be used with all paint types.
- Very Smooth (0"-3/16"): This nap length works very well for painting ultra smooth surfaces such as metal or finely sanded or finished wood. This nap works well with either gloss or semi-gloss paints in both latex and oil-based.
- Smooth (3/16"-1/4"): This nap depth is intended for painting drywall or smooth plaster walls and ceilings. This nap works well with either gloss or semi-gloss paints in both latex and oil-based.
- Semi Smooth (1/4"-3/8"): This nap works great for slightly textured (orange peel, eggshell, dimpled) drywall or plaster. This nap works well with either semi-gloss, stain or matte paints in both latex and oil-based.
- Semi Rough (3/8"x1/2"): This nap is used to paint rougher woods to acoustic tile surfaces. It works well with either semi-gloss, stain or matte paints in both latex and oil-based.
- Rough (3/4"-1"): This nap is intended for painting textured ceilings and rougher surfaces like stucco. This length nap works well with either semi-gloss, stain or matte paints in both latex and oil-based.
- Very Rough (1 1/4"-1 1/2"): This nap depth works well for concrete block and brick, as well as other masonry and wood and metal fences. This length nap works well with either semi-gloss, stain or matte paints in both latex and oil-based.
As with the other products listed above the more expensive the cover the better the coverage and ease of completing the job.
Quick Select Charts
Use the charts below to quickly determine the paint brushes, roller frames and covers you require:
Paint Brush Quick Select Chart
Key: N (Nylon) ~ N/P (Nylon/Polyester) ~ P (Polyester) ~ OX (Ox hair) ~ WC (White China) ~ BC (Black China)
| Surface Type | Brush Size | End Type | Bristle Type | Paint |
|
Interior Walls Smooth Texture |
4" ~ 5" ~ 6" |
Square Trim |
N ~ N/P ~ P |
Latex |
| Interior Window Trim | 1" ~ 1.5" ~ 2" | Angled | N ~ N/P ~ P | Latex |
| Interior Door Trim | 1" ~ 1.5" ~ 2" | Angled | N ~ N/P ~ P | Latex |
| Interior Baseboard | 1" ~ 1.5" ~ 2" | Angled | N ~ N/P ~ P | Latex |
| Interior Door | 2.5" ~ 3" ~ 4" | Square Trim | N ~ N/P ~ P | Latex |
| Interior Shelving | 3" ~ 4" ~ 5" | Square Trim | N ~ N/P ~ P | Latex |
|
Edging between walls, |
2" ~ 2.5" ~ 3" | Chisel Trim | N ~ N/P ~ P | Latex |
|
Exterior Walls Smooth Texture |
4" ~ 5" ~ 6" |
Square Trim |
OX ~ WC ~ BC |
Oil |
| Exterior Window Trim | 1" ~ 1.5" ~ 2" | Angled | OX ~ WC ~ BC | Oil |
| Exterior Door Trim | 1" ~ 1.5" ~ 2" | Angled | OX ~ WC ~ BC | Oil |
| Exterior Door | 2.5" ~ 3" ~ 4" | Square Trim | OX ~ WC ~ BC | Oil |
Roller Frame/Cover Quick Select Chart
Key: N (Nylon) ~ D (Dacron) ~ P (Polyester) ~ M (Mohair) ~ S (Sheepskin)
| Surface Type | Frame Size | Fabric Type |
NAP Depth |
Paint |
|
Interior Walls Smooth Texture |
9" ~ 12" ~ 18" |
N ~ D ~ P |
0"-1/4" |
Latex |
| Interior Window Trim | 3" ~ 4" | N ~ D ~ P | 3/16"-3/8" | Latex |
| Interior Door Trim | 3" ~ 4" | N ~ D ~ P | 3/16"-3/8" | Latex |
| Interior Baseboard | 3" ~ 4" | N ~ D ~ P | 3/16"-3/8" | Latex |
| Interior Door | 6" ~ 7" | N ~ D ~ P | 3/16"-3/8" | Latex |
| Interior Shelving | 3" ~ 4" ~ 6" ~ 7" | N ~ D ~ P | 3/16"-3/8" | Latex |
|
Exterior Walls Smooth Texture |
9" ~ 12" ~ 18" |
M ~ S |
0"-1/4" |
Oil |
| Exterior Window Trim | 3" ~ 4" | M ~ S | 3/16"-3/8" | Oil |
| Exterior Door Trim | 3" ~ 4" | M ~ S | 3/16"-3/8" | Oil |
| Exterior Door | 6" ~ 7" | M ~ S | 3/16"-3/8" | Oil |
Once all repairs have been completed to you wall surface, if required, you are ready for the next step - taping off trim, edges, doors, windows, etc. This is a fairly easy process and you may follow these steps for completion:
- Ensure all areas that are to be taped have been wiped down with a damp rag and allowed to dry.
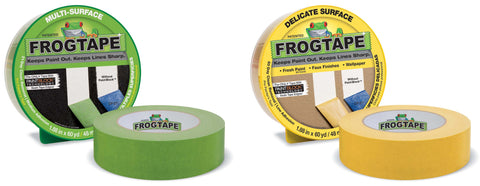
- We recommend Frog Tape, that again, can be purchased at nearly any hardware store and there are two different types; green for multiple surfaces and yellow for delicate. You will more than likely utilize the multi-surface tape.
- One tip for this step - never tear pieces off the roll as overlapping sections will allow a large gap to exist allowing paint to wick under it.
- Pull approximately 18" of tape from the roll at a time and align on edges. Press the tape down along the entire length then continue with the next 18". NOTE: DO NOT PULL THE TAPE TIGHT AS IT MAY BREAK.
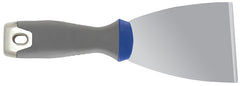
- Once all tape is installed take a 2" putty knife and place the blade on the tape at a 45" angle. Place a fair amount of pressure on the blade and pull it across the length of the tape to securely press the edge of the tape against the surface.
- Once your painting is complete and prior to it completely drying you will need to remove the tape. If the paint is allowed to complete dry you may take a utility knife and run the blade between the edge of the tape and the newly painted surface to break the bond.
- To remove the tape start at a corner and pull the tape back approximately 6 inches. Once peeled back pull the tape at a 45 degree angle, twelve inches at a time, and continue to pull the length of the tape, at a moderate speed, until you reach the end. If you begin to hear a ripping sound you are going to fast.


Prepping to paint is one of the most overlooked aspects of painting a room. The majority of people simply wipe down the walls and begin painting, however to obtain a professional look simply take the extra time, be patient and follow these steps:
- Paint scrapers come in a wide array of sizes and configurations, however s simple scraper will work for most applications. A good 3" scraper with a tapered blade can be purchased for less than $10 any any hardware store.
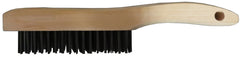
- You will want to purchase a coarse wire brush to remove large areas of peeling or flaking paint. Ensure you buy a brush with a handle as it is easier to use than a palm held brush. A decent wire brush may be purchased for around $5.
- If the removed paint were only a lite coat then you may be able to simply sand the edges to level the edges of the intact paint with the wall surface. You will want a sandpaper with a fine grit rating of between 180 and 220.
- If the removed paint layers were slightly thicker you will need to fill the scraped area with a spackling compound. One of the best spackles is manufactured by DAP and is available for purchase at any hardware store for less than $10. Utilize a 2"-3" putty knife to fill the area and smooth it our as best as possible. Once the compound has dried you will require a 180-220 grit sandpaper to smooth the area out. If the area filled is 2" or less you may simply use sandpaper, however the the area is larger than 2" it will be best to use a sanding block to help keep the area level while sanding.

Sign up to get the latest on sales, new releases and more …

© 2026 About Wall Decor.
2006-2015 SerKlin Enterprises, Inc. All Rights Reserved.
Powered by Shopify